
In the realm of comfort food, few dishes can claim the universal appeal and sheer delight that corn nuggets bring to the table. These crispy, golden bites encapsulate the sweetness of corn in a crunchy exterior, making them an irresistible snack or side dish. Whether you’re a seasoned chef or a culinary novice, mastering the art of making corn nuggets promises a rewarding and delicious experience. This guide will take you through everything you need to know about creating the perfect corn nuggets, from selecting the right ingredients to serving them with flair. So, let’s embark on this tasty journey together and uncover the secrets to making your very own mouthwatering corn nuggets.
Understanding Corn Nuggets
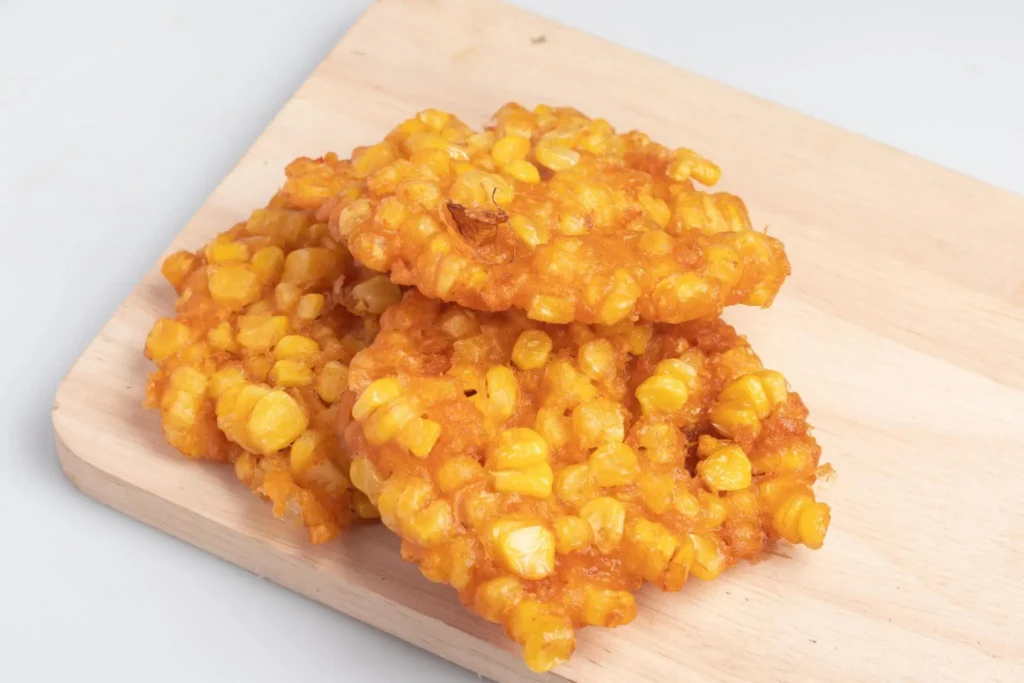
Corn nuggets, small but mighty, are a testament to the joy of snacking. Imagine the sweetness of corn encased in a light, crispy batter, fried to perfection. These bite-sized delights are not only a favorite among corn lovers but also a versatile dish that can be served in various ways.
What Are Corn Nuggets?
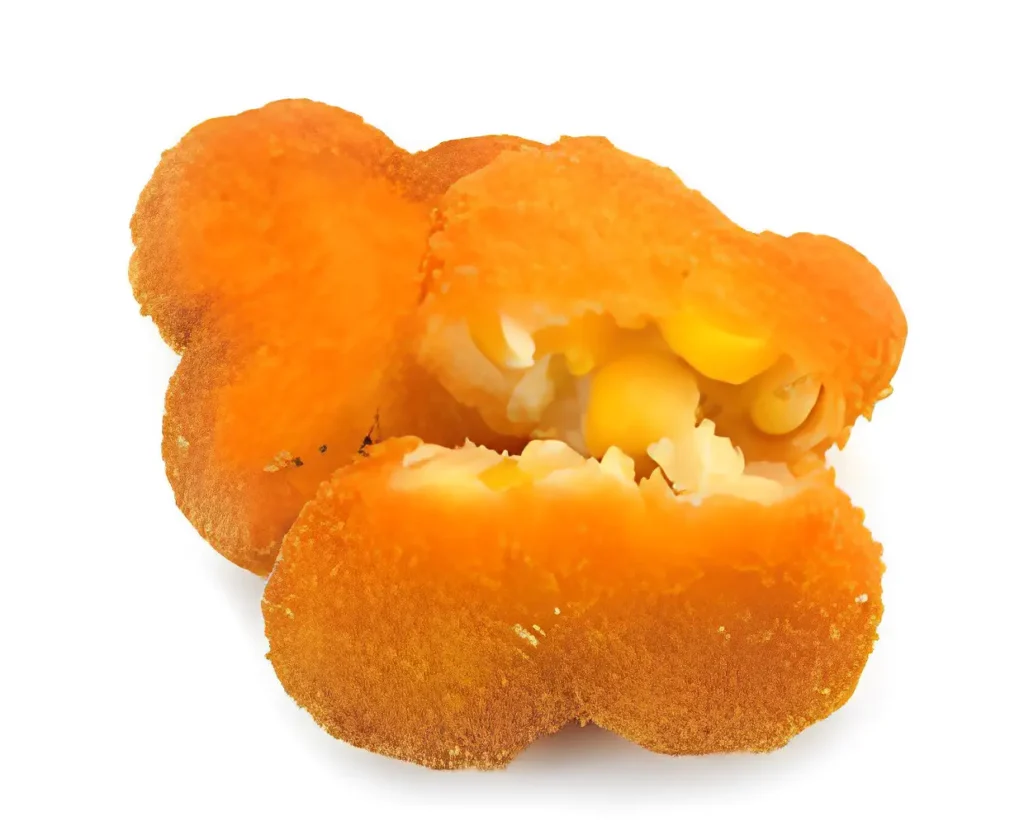
At their core, corn nuggets are a celebration of corn, one of the most beloved and versatile vegetables. They are akin to fritters, combining corn kernels with a light batter, then fried until they achieve a golden, crispy exterior. The result is a snack that’s crunchy on the outside, soft on the inside, and utterly irresistible.
Why You’ll Love This Recipe
This particular corn nuggets recipe stands out for several reasons, making it a guaranteed winner in any culinary repertoire:
- Vegan: Unlike traditional recipes, this version is completely plant-based, offering a delightful option for vegans and non-vegans alike.
- Easy to Make: With straightforward instructions and minimal prep work, these corn nuggets can be whipped up in no time, making them perfect for a quick snack or a unique addition to any meal.
- Customizable: The recipe allows for creativity with seasonings, herbs, and spices. Don’t hesitate to add your personal touch and make these corn nuggets uniquely yours.
Stay tuned as we dive deeper into the ingredients and step-by-step instructions to ensure your corn nuggets are nothing short of perfect. Whether you’re planning a cozy night in or looking for the ideal party snack, these corn nuggets are sure to impress.
Ingredients Breakdown
Creating the perfect corn nuggets starts with understanding and gathering the right ingredients. Each component plays a crucial role in achieving the ideal balance of flavor and texture. Here’s a detailed breakdown of what you’ll need and why each ingredient is essential to your corn nuggets recipe.
Key Ingredients Overview
- All-purpose Flour: The foundation of the batter, all-purpose flour helps create a light coating that crisps up beautifully when fried. For a gluten-free version, a measure-for-measure gluten-free flour blend can be substituted.
- Baking Powder: This leavening agent ensures your nuggets puff up slightly, giving them a delightful lightness.
- Granulated Sugar: A touch of sugar enhances the natural sweetness of the corn, balancing the savory elements of the batter.
- Salt and Black Pepper: Essential for seasoning, salt, and freshly cracked black pepper add depth and elevate the overall flavor profile of the nuggets.
- Almond Milk: Used as the liquid base of the batter, unsweetened and unflavored almond milk keeps the recipe vegan. Any plant-based milk can be used as a substitute. For an in-depth guide on choosing the best plant-based milk alternatives for your recipes, including almond milk, visit Vegetarian Times.
- Aquafaba: The secret ingredient for binding the batter without eggs, aquafaba (the liquid from canned chickpeas) works wonders in vegan cooking.
- Vegan Butter: Adds richness to the batter, ensuring the nuggets are moist on the inside. Store-bought or homemade vegan butter both work well.
- Corn Kernels: The star of the show, corn kernels can be fresh, canned, or thawed from frozen. Each type brings its sweetness and texture to the nuggets.
- Vegetable Oil: Chosen for frying, vegetable oil has a neutral flavor and high smoke point, making it ideal for achieving that golden, crispy exterior.
Understanding Aquafaba
Aquafaba, the liquid gold of vegan baking and cooking, acts as an egg replacement in this recipe. It can be whipped into peaks or used as is to bind ingredients together, adding moisture and lightness to the batter. This versatile ingredient is a staple in plant-based recipes, from meringues to soufflés, and plays a pivotal role in these corn nuggets.
With your ingredients ready, you’re set to embark on the culinary adventure of making corn nuggets. Each element comes together to create a dish that’s not only delicious but also a testament to the joy of vegan cooking. Stay tuned for the step-by-step guide in the next section, where we’ll dive into the mixing, shaping, and frying of your soon-to-be favorite snack.
Crafting Your Corn Nuggets
With all the ingredients ready, it’s time to dive into the heart of making corn nuggets. This step-by-step guide will walk you through the process, ensuring that each nugget turns out perfectly crispy on the outside and deliciously soft on the inside. Let’s get started!
Preparing the Batter
- Mix the Dry Ingredients: In a large mixing bowl, whisk together the all-purpose flour, baking powder, granulated sugar, salt, and freshly cracked black pepper. This mixture will ensure your nuggets have the right flavor and texture.
- Combine the Wet Ingredients: In a separate bowl, whisk together the almond milk, aquafaba, and melted vegan butter. These wet ingredients will bind the dry ingredients together, creating a smooth batter.
- Combine Wet and Dry: Gradually pour the wet ingredients into the dry ingredients, whisking continuously to avoid lumps. The goal is to achieve a batter that’s smooth and consistent.
- Fold in the Corn: Gently fold the corn kernels into the batter, ensuring they’re evenly distributed. This step is crucial for making sure every nugget is packed with sweet corn flavor.
Frying to Perfection
- Heat the Oil: In a deep skillet or pot, heat the vegetable oil over medium heat until it reaches 365°F (185°C). Using a thermometer is key to ensuring the oil is at the perfect temperature for frying.
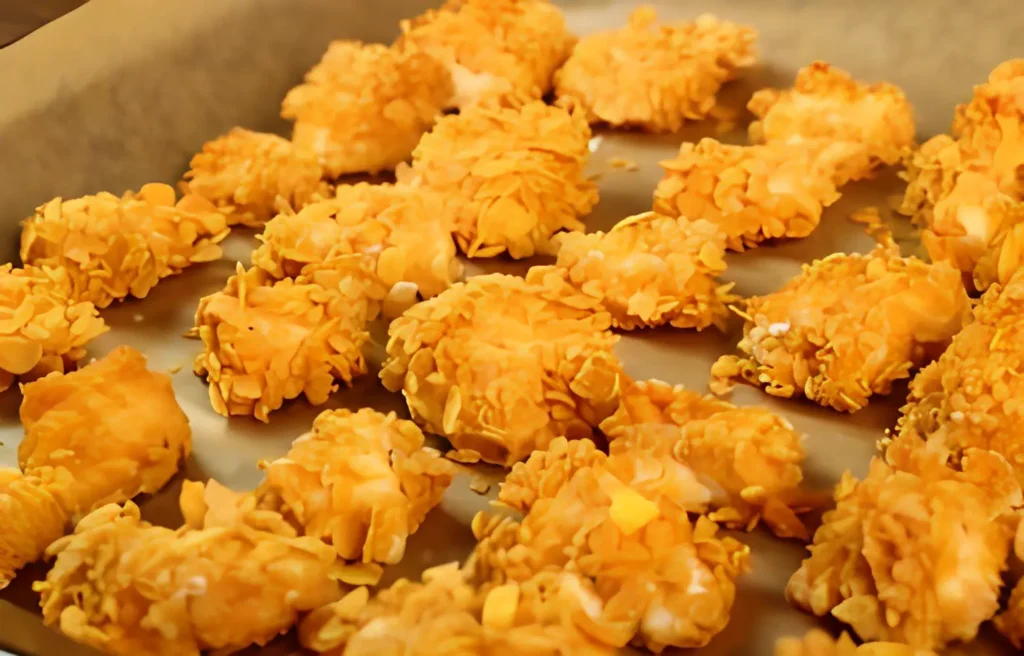
- Form the Nuggets: Using a spoon, carefully drop spoonfuls of the corn batter into the hot oil. Be careful not to overcrowd the pan, as this can lower the oil’s temperature and result in soggy nuggets.
- Fry Until Golden Brown: Fry the nuggets for about 3 minutes on each side, or until they’re golden brown and crispy. It’s important to turn them halfway through to ensure even cooking.
- Drain and Serve: Once fried, use a slotted spoon to transfer the nuggets to a paper towel-lined plate to drain any excess oil. Serve the corn nuggets hot for the best texture and flavor.
Serving Suggestions
Corn nuggets are incredibly versatile and can be served in a variety of ways. Pair them with your favorite dipping sauces, such as hot sauce, tartar sauce, vegan mayo, or vegan ranch dressing, for an extra flavor boost. Whether enjoyed as an appetizer, snack, or side dish, these corn nuggets are sure to be a hit. Discover a variety of dipping sauce recipes to complement your corn nuggets at Food Network.
Stay tuned for the next section, where we’ll explore how to customize your corn nuggets recipe with different seasonings and adaptations, making it truly your own.
Making the Recipe Your Own
One of the joys of cooking is the ability to tweak and customize recipes to suit your personal taste. This corn nuggets recipe is no exception. With a few simple adjustments, you can add your own spin to this delicious snack, making it even more irresistible. Let’s explore some variations and customizations that can help you make this recipe uniquely yours.
Seasoning Variations
The basic recipe for corn nuggets provides a deliciously savory flavor with a hint of sweetness from the corn. However, there’s plenty of room to experiment with additional seasonings to add depth or a kick of flavor. Consider incorporating some of these options:
- Smoked Paprika: For a smoky twist, add a teaspoon of smoked paprika to the batter. It complements the sweetness of the corn beautifully.
- Cayenne Pepper: If you enjoy a bit of heat, a pinch of cayenne pepper can add a nice warmth to the nuggets.
- Chili Powder: For a Tex-Mex flair, try adding chili powder to the mix. It pairs well with corn and adds an interesting dimension to the flavor profile.
- Fresh Herbs: Finely chopped fresh herbs like cilantro, parsley, or chives can add a burst of freshness and color to the nuggets.
Find inspiration for seasoning blends and how to use herbs and spices in your cooking at The Kitchn.
Gluten-Free Adaptations
For those avoiding gluten, this recipe can easily be adapted to be gluten-free without sacrificing texture or flavor. Simply substitute the all-purpose flour with your favorite gluten-free flour blend. Look for a blend that’s designed to be a 1:1 replacement for wheat flour to ensure the best results. Explore gluten-free flour options and their best uses in recipes like this one on King Arthur Baking.
Adding Extras
Feel free to get creative by adding additional ingredients to the batter. Here are a few ideas:
- Cheese: For a cheesy twist, fold in some shredded vegan cheese before frying. It’ll melt into the nuggets, adding a creamy texture and rich flavor.
- Jalapeños: Diced jalapeños can add a spicy kick and a bit of crunch to your corn nuggets.
- Bell Peppers: Finely diced bell peppers can add sweetness and a pop of color to the dish.
By experimenting with different herbs, spices, and add-ins, you can tailor this corn nuggets recipe to fit any occasion or palate. Don’t be afraid to try new combinations and discover your favorite version of this versatile snack.
Stay tuned for the next section, where we’ll cover frequently asked questions about making corn nuggets, providing you with additional tips and insights to ensure your culinary success.
Answering Your Corn Nuggets Questions
When diving into the delicious world of corn nuggets, a few questions might pop up. Whether it’s about the type of corn to use, storage tips, or making the recipe gluten-free, we’ve got you covered. Here are answers to some frequently asked questions about making corn nuggets.
What type of corn is best for this recipe?
You can use fresh, canned, or frozen (and thawed) corn kernels for this recipe. Fresh corn kernels, cut straight off the cob, provide the best flavor and texture. However, canned or frozen corn also works well, offering convenience and year-round availability. If using canned corn, be sure to drain it well. For frozen corn, thaw and drain any excess moisture before adding it to the batter.
Can I make corn nuggets ahead of time?
Yes, you can prepare corn nuggets ahead of time. Fry them as directed, allow them to cool completely, and then store them in an airtight container in the refrigerator. When you’re ready to serve, reheat them in the oven at 400°F until they’re crispy and warmed through. This method helps maintain their texture better than microwaving.
Are corn nuggets freezer-friendly?
Absolutely! Corn nuggets freeze beautifully. After frying and cooling, place them in a single layer on a baking sheet to freeze individually. Once frozen, transfer them to a freezer-safe bag or container. They can be stored for up to 3 months. Reheat from frozen in the oven at 400°F until crispy and hot.
How can I make this recipe gluten-free?
To make gluten-free corn nuggets, substitute the all-purpose flour with a gluten-free flour blend designed for 1:1 substitution. Ensure that the blend you choose doesn’t contain any added binders or leavening agents that could affect the texture of the nuggets.
Can I bake these corn nuggets instead of frying?
While frying gives corn nuggets their characteristic crispy texture, you can bake them for a healthier option. Place the batter-dropped nuggets on a lined baking sheet and bake at 425°F until they’re golden and crispy, flipping halfway through. Keep in mind that the texture will be slightly different from fried nuggets but still delicious.
By addressing these common queries, we hope to make your corn nuggets-making experience as smooth and enjoyable as possible. Remember, the key to perfect corn nuggets lies in the details, from choosing the right type of corn to storing them properly for later enjoyment.
Stay tuned for the final section, where we’ll share tips on storing and reheating your corn nuggets to keep them tasting their best.
Keeping Your Corn Nuggets Delicious
After mastering the art of making corn nuggets, ensuring they remain deliciously crispy and enjoyable is the next step. Proper storage and reheating techniques can make all the difference in preserving their texture and flavor. Here are some tips to help you keep your corn nuggets tasting as good as when you first made them.
Storing Leftovers
If you find yourself with leftover corn nuggets, storing them correctly is key to maintaining their quality. Place the cooled nuggets in an airtight container and refrigerate them for up to 3 days. It’s important to let them cool completely before storing to prevent any steam from making them soggy.
Reheating for Best Results
The best way to reheat corn nuggets is in the oven or an air fryer, as these methods help restore their crispy texture.
- Oven: Preheat your oven to 400°F. Spread the corn nuggets out on a baking sheet in a single layer and bake until they’re heated through and crispy, about 10-15 minutes. Flipping them halfway through the reheating process ensures even crispiness.
- Air Fryer: If you have an air fryer, it’s an excellent tool for reheating corn nuggets. Set the air fryer to 380°F and cook the nuggets for about 3-5 minutes, or until they’re crispy and warmed throughout.
Microwaving is not recommended for reheating these nuggets, as it tends to make them soft and chewy rather than crispy.
Freezing Corn Nuggets
Corn nuggets freeze exceptionally well, making them a convenient make-ahead option. To freeze, place the cooled nuggets on a baking sheet in a single layer and freeze until solid. Once frozen, transfer them to a freezer-safe bag or container. They can be stored in the freezer for up to 3 months.
When you’re ready to enjoy, there’s no need to thaw the nuggets; simply reheat them directly from frozen using the oven or air fryer method mentioned above. This ensures they regain their crispy texture and are as delicious as when they were first made.
By following these storage and reheating tips, you can enjoy your homemade corn nuggets any time the craving strikes. Whether you’re making a batch for a party, a family dinner, or simply as a treat for yourself, these nuggets are sure to be a hit.
Thank you for following along with this guide to making the perfect corn nuggets. We hope you feel inspired to try this recipe and enjoy the delicious results. Happy cooking!
Conclusion
Embarking on the journey to create homemade corn nuggets brings more than just a delicious snack to your table—it invites a sense of accomplishment and the joy of sharing something truly special with friends and family. From the initial selection of ingredients to the final bite, each step is filled with opportunities for creativity, learning, and enjoyment.
These crispy, golden delights are not just about indulging in the sweet and savory flavors of corn; they’re about embracing the versatility of vegan cooking, exploring the nuances of seasoning, and discovering the satisfaction of crafting a beloved treat from scratch. Whether you stick to the classic recipe or venture into customizations and variations, the result is sure to be a crowd-pleaser.
We hope this guide has inspired you to don your chef’s hat and dive into the world of homemade corn nuggets. With a little patience and a lot of passion, you’re well on your way to creating a snack that’s not only tasty but also uniquely yours. Happy frying, and enjoy the delicious rewards of your culinary adventure!